.-----------------------------------------------------------------------------.
| WebP Polyglot I: Bootable Picture |
'-----------------------------------------------------------------------------'
updated: 2023-10-23
 Polyglot formats are fascinating due to their ability to be interpreted in
multiple ways. For instance, a single file can be both a valid C code and a
valid shell script at the same time. (I often leverage C polyglot when I'm
prototyping in C -- see [ref0] for more details).
This article pays tribute to the ingenious idea of the polyglot format
presented in the profound PoC || GTFO Issue 0x02 [ref1]. The document itself
serves as both a bootable i386 image and a PDF document. The creation process
is described in chapter "8 This OS is also a PDF" by Ange Albertini.
To summarise:
- The PDF magic header must be present within the first 1024 bytes of the
file.
- The percent character '%' serves as a comment marker in the context of
PDF and simultaneously encodes the 'AND' instruction in x86.
- The file begins with the '%' character, within which resides x86 code.
- This code is followed by the PDF document.
(While the actual mechanism is slightly more complicated, the essence is
captured here. I wholeheartedly recommend delving into the issue for a more
comprehensive understanding.)
Such an inspiring hack! I have to create my own polyglot format. There is
simply no other way, only the Hacker Way!
I wanted to create a "badge" to reward individuals who successfully complete
challenges on this website. Rather than a mere graphic, I sought something more
profound, imbued with a hacker ethos. It was then that I remembered the
polyglots from PoC || GTFO and realized how fitting it would be to have a
similar bootable picture.
My vision was to craft an image that not only works seamlessly in modern web
browsers but is also bootable as x86 binary. To accomplish this, the image
format must be structured in a way that allows execution on x86 architecture
without causing any fatal side effects, while remaining a valid image.
Commonly supported image formats in most modern web browsers include [ref2]:
PNG, JPEG, GIF, ICO, BMP, and WebP. When we disassemble the magic header of
these formats, it becomes apparent that only BMP and WebP are viable without
causing serious side effects (see APPENDIX A: Good image format).
I decided to use WebP because it seemed to be almost ideal for embedding like
this.
The WebP format uses RIFF containerization [ref3] [ref4], with a simple
structure composed of multiple chunks. Each chunk is a basic building block,
consisting of a 4-byte ID, 4-byte size, and data of variable size. The
structure can be visualized as follows:
-------------------------------[ riff_chunk.h ]--------------------------------
Polyglot formats are fascinating due to their ability to be interpreted in
multiple ways. For instance, a single file can be both a valid C code and a
valid shell script at the same time. (I often leverage C polyglot when I'm
prototyping in C -- see [ref0] for more details).
This article pays tribute to the ingenious idea of the polyglot format
presented in the profound PoC || GTFO Issue 0x02 [ref1]. The document itself
serves as both a bootable i386 image and a PDF document. The creation process
is described in chapter "8 This OS is also a PDF" by Ange Albertini.
To summarise:
- The PDF magic header must be present within the first 1024 bytes of the
file.
- The percent character '%' serves as a comment marker in the context of
PDF and simultaneously encodes the 'AND' instruction in x86.
- The file begins with the '%' character, within which resides x86 code.
- This code is followed by the PDF document.
(While the actual mechanism is slightly more complicated, the essence is
captured here. I wholeheartedly recommend delving into the issue for a more
comprehensive understanding.)
Such an inspiring hack! I have to create my own polyglot format. There is
simply no other way, only the Hacker Way!
I wanted to create a "badge" to reward individuals who successfully complete
challenges on this website. Rather than a mere graphic, I sought something more
profound, imbued with a hacker ethos. It was then that I remembered the
polyglots from PoC || GTFO and realized how fitting it would be to have a
similar bootable picture.
My vision was to craft an image that not only works seamlessly in modern web
browsers but is also bootable as x86 binary. To accomplish this, the image
format must be structured in a way that allows execution on x86 architecture
without causing any fatal side effects, while remaining a valid image.
Commonly supported image formats in most modern web browsers include [ref2]:
PNG, JPEG, GIF, ICO, BMP, and WebP. When we disassemble the magic header of
these formats, it becomes apparent that only BMP and WebP are viable without
causing serious side effects (see APPENDIX A: Good image format).
I decided to use WebP because it seemed to be almost ideal for embedding like
this.
The WebP format uses RIFF containerization [ref3] [ref4], with a simple
structure composed of multiple chunks. Each chunk is a basic building block,
consisting of a 4-byte ID, 4-byte size, and data of variable size. The
structure can be visualized as follows:
-------------------------------[ riff_chunk.h ]--------------------------------
struct riff_chunk {
uint32_t chunk_id; /* Chunk type identifier */
uint32_t chunk_size; /* Chunk size field (size of ck_data) */
uint8_t chunk_data[]; /* Chunk data */
};
-------------------------------------------------------------------------------
The WebP format can be illustrated as:
RIFF_ID RIFF_SIZE WEBP_ID VP8?_ID VP8?_SIZE VP8?_DATA ...
Note: 'VP8?' refers to either 'VP8L' (lossless format), 'VP8 ' (lossy
format), or 'VP8X' (extended header), more on that later.
An annotated hex dump of the first 16 bytes of a WebP image:
RIFF chunk_size chunk_data
v-------v v...........
00000000: 5249 4646 9c17 0000 5745 4250 5650 3858 RIFF....WEBPVP8X
^-------^ ^-------^ ^----+--^
RIFF chunk_id WebP container '--> VP8X chunk_id
There are of course some complications:
1. The size of every chunk ('chunk_size') must always be an EVEN number! If
the data is not even, we have to pad it (typically with 0x00). This is crucial
to correctly locate the next chunk.
2. The first point has a serious implication: the final RIFF 'chunk_size'
will ALWAYS be an even number when we add up all chunks and headers! If we put
an odd number in there, most WebP image parsers will fail! Here is the quote
from the WebP specification [ref4]:
As the size of any chunk is even, the size given by the RIFF header is also
even. The contents of individual chunks are described in the following
sections.
(This will bite us later.)
3. If we wish to include additional data beyond a single raw image ('VP8L' or
'VP8 '), we must utilize the extended header ('VP8X'). Without using it,
viewers will often refuse to render the image.
When creating a bootable x86 polyglot, we need some cooperation from the chosen
format. WebP, or more specifically, RIFF, is great for that because the header
disassembles into the following instructions:
$ printf 'RIFF' | ndisasm -b 16 -
00000000 52 push dx
00000001 49 dec cx
00000002 46 inc si
00000003 46 inc si
Not only does the RIFF header serve as benign x86 code, but we can also
manipulate the following 4 bytes, which represent the size of the RIFF data
('chunk_size'). This capability is incredibly powerful as we can utilize it
for a jump instruction that transfers the execution to a location where we have
full control.
It's not perfect as we are restricted by several limitations:
1. We have a maximum of 4 bytes available for an OPCODE and OPERANDS.
2. We have to be careful not to use all 4 bytes, as this could result in an
excessively large file size. We would like to keep it well under 16 MiB
('0x01000000 = 16777216 = 16.0 MiB').
3. We should use a maximum of an 8-bit address for a relative/near jump to
prevent a large file size. Generally, we should aim to use a maximum of 3
bytes.
4. Using an 8-bit address implies that our code must be positioned within the
first +-127 bytes of the image (or +-255 if we use the first half of 16-bit
address).
5. Remember when I mentioned that the RIFF 'chunk_size' must be an even
number? Well, now it strikes at its full force, as we need to find a jump
OPCODE that is also even. This is because the x86 architecture works with
numbers in little endian format, while instructions are read sequentially.
This process can be illustrated as follows:
Example of a RIFF chunk size:
.---. address
v v
E9 26 00 00
^ ^--- next instruction
jmp opcode
The CPU processes it in two parts:
- The OPCODE 'E9' is parsed and decoded as 'jmp'.
- 'jmp' has one OPERAND '2600', a two-byte address that is internally
converted into a 16-bit little endian address '0x0026'.
In contrast, an image viewer immediately reads a 32-bit little endian number
('uint32_t'). Thus, bytes 'E9260000' are converted into the integer
'0x0026E9'. However, this number is not even, rendering it an invalid WebP
image!
Now our quest begins: we must find THE ultimate jump instruction. I've been
using the excellent x86 codes table from [ref5], and to my surprise, almost
all the jump instructions I was planing to use have an odd size! So, what can
we do about it? Let's use a little bit of brain thinking.
There are at least three possibilities:
1. We can prepend a dummy, one-byte, and even-sized instruction before our
odd-sized jump. For example, the 'NOP' instruction ('0x90'). The downside
is that the overall size will increase. How much? Well, when we use an 8-bit
address for the near jump and place our code as close as possible, we should
be fine as the size will be 1.99 MiB:
90 E9 1F 00 -> 0x001FE990 = 2091408 = 1.99 MiB
The magnitude of the increase is mostly determined by the relative address to
which we are jumping:
90 E9 01 00 -> 122.4 KiB
90 E9 ff 00 -> 15.99 MiB
2. We can do a RIFF (and BIOS) specific hack (after all, that's the reason why
we're here, am I right, boiz?!) If we look at the disassembled 'RIFF' header
above, we can see that the 'I' character stands for the 'dec cx'
instruction. If we make a big assumption that the BIOS will set the 'cx'
register to any value except '1', we can leverage certain jump instructions.
Let's pretend that 'cx' will always be zero. The instruction 'dec cx' will
decrement 'cx' by one, and 'cx' will naturally contain a non-zero value.
The jump instructions that examine the value of 'cx' and decide whether to
jump based on its content are the LOOP instructions:
OPCODE INSTR OPERAND DESCRIPTION
--------------------------------------------------------------------------
E0 LOOPNE rel8 Decrement count; Jump short if count!=0 and ZF=0
E2 LOOP rel8 Decrement count; Jump short if count!=0
They meet all our requirements: occupying only 2 bytes (ensuring the overall
file size remains small and easily scalable), and most importantly, the size
will always be an even number:
E2 26 00 00 -> 0x000026E2 = 9954 = 9.72 KiB
^-- even sized
Unfortunately, we cannot generally assume the state of most registers, as it
is not standardized, and there are BIOSes that don't reset registers (i.e.,
'cx' may contain a "random" value, including 1.
3. There is one other "jump" instruction that can result in shorter sizes, and
that is the 'call' instruction. Its opcode is 'E8', which means it's
even-sized, therefore we can encode our jump into two bytes:
E8 1F 00 00 -> 7.98 KiB
This is the "go to" instruction when we want smaller images.
With this knowledge, nothing can stop us now!
The fun part is about to begin. Our next objective is to embed executable data
into the first 512 bytes of our image (as we want the BIOS to load it as the
code for the Master Boot Record).
There are two types of the WebP image format:
- Simple File Format
- Extended File Format
The Simple file format is too restrictive for our purpose as it anticipates the
'WEBP' chunk ID immediately followed by either 'VP8L' or 'VP8 ' (btw,
there is a space at the end of the 'VP8 ' ID). While we could create a small
image and place our MBR code at the end of the file, there is a better
alternative.
The Extended File Format enables us to inject EXIF or even a custom header.
Here is what the specification states [ref6]:
A RIFF chunk (described in the RIFF File Format section) whose FourCC
(i.e., Chunk ID) is different from any of the chunks described in this
document, is considered an unknown chunk.
...
Readers SHOULD ignore these chunks.
With this in mind, we can design the structure of our bootable image as
follows:
0 4 8
|---------------------+-------------------|
| RIFF ID | RIFF size |
+---------------------+-------------------+
| WebP ID | VP8X ID |
+---------------------+-------------------+
| VP8X size (= 0x0a) | VP8X data |
+---------------------+-------------------+
| OUR ID | OUR size |
+---------------------+-------------------+
| our MBR code ... |
+---------------------+-------------------+
| VP8L ID | VP8L size |
+---------------------+-------------------+
| VP8L image data... |
'-----------------------------------------'
The crucial element of the structure mentioned above is the VP8X header and we
must learn how to use it correctly. Otherwise, the image will be invalid and
most readers will abort the parsing process.
The following part might be a bit dry, but we need it for correctly assembling
a WebP image.
The 'VP8X' chunk ID indicates the Extended File Format, providing additional
information about an image. It must be well-formed with the correct values.
While its chunk size is not necessarily limited, some viewers expect 10 bytes
(more on this atrocity later).
The VP8X structure consists of the following components: [ref4]
- 2 bits: Reserved. MUST be 0. Readers MUST ignore this field.
- 1 bit: Set if the file contains an 'ICCP' Chunk.
- 1 bit: Set if any of the frames of the image contain transparency
information ("alpha").
- 1 bit: Set if the file contains Exif metadata.
- 1 bit: Set if the file contains XMP metadata.
- 1 bit: Set if this is an animated image. Data in 'ANIM' and 'ANMF' Chunks
should be used to control the animation.
- 1 bit: Reserved. MUST be 0. Readers MUST ignore this field.
- 24 bits: Reserved. MUST be 0. Readers MUST ignore this field.
- 24 bits: Canvas Width Minus One
- 24 bits: Canvas Height Minus One
If we are using a simple VP8L image (with no ICCP or ALPH), we can zero out all
the flags (the first 8 bits), but we must always ALWAYS fill in the correct
values for the canvas width and height. If readers discover different canvas
sizes between VP8X (extended header) and VP8L (lossless image), they will
result in an error. When creating a new VP8X extended header, we need to
extract the canvas values from the VP8L lossless image.
The VP8L format is defined in [ref7] and the beginning of the structure looks
like this:
| 32 bits | 32 bits | 8 bits | 14 bits | 14 bits | ...
+---------+-----------+-----------+-------------+--------------+----
| VP8L ID | VP8L SIZE | signature | image WIDTH | image HEIGHT | ...
The canvas size is not easy to obtain, but it's not particularly difficult
either. We can read 32-bits starting at offset 1, then shift and mask it to
14-bits ('(1 << 14) -1 = 0x3fff'):
vp8l_canvas = *(uint32_t *) &(vp8l->chunk_data[1]);
vp8l_image_width = canvas & 0x3fff;
vp8l_image_height = (canvas >> 14) & 0x3fff;
'vp8l_image_width' and 'vp8l_image_height' are the values that we need to
fill into the VP8X canvas.
Now, the easiest part (that's a lie, of course) is to compute offsets and chunk
sizes.
Initially, it seemed that we wouldn't have enough wiggle room, as we needed to
inject data as early as possible. However, the previous section reveals that we
have all that we need.
The summary of the process is as follows:
- Open a WebP (lossless) image.
- Locate the 'VP8L' chunk.
- Obtain the canvas size for 'VP8L'.
- Create the new 'RIFF-WebP' header.
- Generate the 'VP8X' header.
- Insert the canvas size into the 'VP8X' header.
- Add our MBR header and data.
- Copy the entire 'VP8L' chunk from the original file.
That sounds easy! How do we put it all together?
The base header will look like this:
"RIFF" 0x000026E2 "WEBP" "VP8X" 0x0000000a "\x00\x00..."
The size of the base header is calculated accordingly as:
4 + 4 + 4 + 4 + 4 + 10 = 30 = 0x1e
After this header, we will inject our data. (We will use "'HACK'" as the
chunk id, just for the heck of it.) Our structure should look like this:
.---------+-----------------+---------+---------+-------------.
| "RIFF" | 0x000026E2 | "WEBP" | "VP8X" | 0x0000000a |
+---------+-----------------+---------+---------+-------------+
| "\x00\x00..." |
+---------+-----------------+---------------------------------+
| "HACK" | HACK_CHUNK_SIZE | "MBR code ..." |
+---------+-----------------+---------------------------------+
| "VP8L" | VP8L_CHUNK_SIZE | "VP8L image data ..." |
'---------+-----------------+---------------------------------'
And now, brace yourself, as the worst is coming up. Let's calculate the padding
size. We must keep in mind the following values:
- The size of the VP8L image.
- The size of our payload.
- All headers.
- Various padding for odd-sized data.
- Our MBR code.
- And most importantly: our MBR code also contains the RIFF-WebP-VP8X headers
at its beginning!
All of these sizes must add up exactly to the RIFF chunk size (the overall
size). This means that we have to pad our code. The equation for the padding is
as follows:
HACK_PADDING = RIFF_CHUNK_SIZE - ((0x1e) + (8 + VP8L_CHUNK_SIZE))
Here, '0x1e' is the size of the base header, and '0x08' is the size of the
VP8L header. We need to ignore the 'HACK' headers because they are the
beginning of our data!
The final size for our payload is determined by:
HACK_CHUNK_SIZE = MBR_DATA_SIZE + HACK_PADDING
Cool! If we assemble all the data together in this manner, we will have a valid
image. However, we still lack a payload to inject. Let's address that.
MASTER BOOT RECORD is a great band, and I highly recommend it! ... I got you
good! The entire article was just an elaborate advertisement for the MASTER
BOOT RECORD band [ref8]! Now, go and listen to the thematic 8086 song here:
[ref9]. Thanks to our sponsor!
... um, even though I'm super rich from this nonexistent sponsorship, let's
finish the article.
So far, we've covered everything except the MBR data/code. If we want to create
a bootable image, we must also generate code that can be read into memory and
executed. The Master Boot Record is a blast from the past, so... This is the
story of a time long ago, a time of myth and legend (which still applies in
2023), when the ancient Real-mode was petty and cruel, and it plagued mankind
with suffering. Only one man dared to challenge their power: Hackerman!
But seriously, creating bootable code is not actually that difficult. Old
BIOSes, sorry, I mean the current BIOSes, can still boot in legacy mode, which
means they start in 16-bit 8086/8088 compatible real mode. (Intel is trying to
phase it out, but we'll see how successful they will be [ref10].)
There are a few important things to know if we want to create MBR code for our
image. Here's a crash course on how BIOS loads MBR:
- BIOS only examines the first 512 bytes (sector) of a medium (e.g., USB
flash disk).
- It searches for the signature '55 AA' at the end of the 512 bytes (511th
and 512th bytes).
- If the signature is found, the BIOS loads the 512 bytes into memory at
offset '0x0000:0x7c00'
- and then jumps to that address.
- The code is executed in 8086/8088 16-bit real mode.
This, along with some basic knowledge of x86 assembly, is sufficient to start
working on a bootable image. There are two crucial things we must keep in mind
when creating such an image:
1. The RIFF header is part of the code! It will always be read because it is
within the first 512 bytes!
2. The overall size must be 512 bytes; therefore, our code and data combined
must fit within that limit:
512 - (RIFF header + 2 bytes for signature) = 512 - (38 + 2) = 472
Having only 472 bytes is not much, especially when we consider that it is for
both code and data. It's funny how quickly data eats up the space when we start
writing text. This paragraph alone has 266 bytes, and that's just data. We also
need code to interpret them.
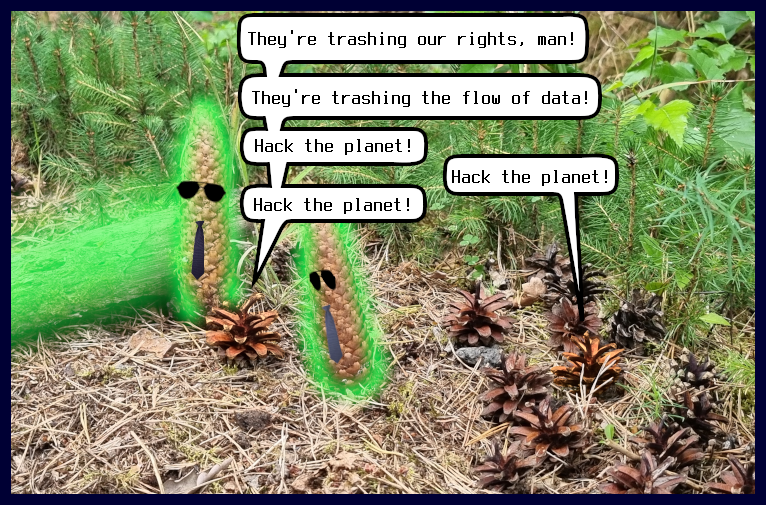
For instance, when I created the MBR for the image in the introduction, I
wanted to include a text from the movie Hackers [ref11] and some simple ASCII
art. I was able to "compress" the ASCII art "images" into bit arrays, but I
struggled with the text. The text itself was 181 bytes, the ASCII art images
were 120 bytes, leaving me with only 171 bytes to display it. I was short by
about 30 bytes for a while. I tried compressing the text using various
algorithms, but each approach ended up consuming more space than the text
alone! It was really fun/frustrating little challenge.
(You can find some inspiration by searching for "Boot Sector Games". For
example, a list of links to MBR games can be found at [ref12]).
Here's a template for MBR code:
---------------------------------[ mbr.nasm ]----------------------------------
BITS 16 ; MBR operates in 16 bit (real) mode
ORG 0x7c00 ; Origin address -> where the BIOS places the bin in memory
; RIFF magic header
db "RIFF" ; Dissasembles to:
; 52 push dx
; 49 dec cx
; 46 inc si
; 46 inc si
; RIFF size
db 0x90 ; NOP
db 0xe9 ; short jump instruction
db (_start - $ - 1) ; 1 byte (jump) offset
db 0x00 ; "padding" -> RIFF size is 4 bytes, jump size is 3 bytes.
; overall size: ~2.5 MiB
; WebP magic header (another RIFF container)
db "WEBP"
; VP8X -- extended header (will be filled by the webp composer)
db "VP8X" ; VP8X chunk id (0x58385056 ; "56503858")
dd 0x0000000a ; VP8X chunk size (always 10 bytes)
times 0xa db 0x00 ; Reserve the space
; Custom Header
db "HACK" ; HACK chunk id (0x4b434148 ; "4841434b")
dd 0x90909090 ; Chunk size will be filled
_start: ; The code
; ...
times 510 - ($ - $$) db 0x4f ; Fill the space up to 510 bytes
db 0x55, 0xaa ; Mark it as MBR
-------------------------------------------------------------------------------
Build:
nasm -f bin mbr.nasm -o mbr.bin
We can test it in two ways:
1. Load 'mbr.bin' with a x86 virtual machine. For example, here is a command
for QEMU:
qemu-system-i386 -fda ./mbr.bin
2. We can use also 'dosbox''s 'BOOT' command:
dosbox -c 'boot out.webp'
3. Or we can test it under DOS when changing the original loading address
'ORG' to '0x0100' and renaming the 'mbr.bin' file to 'mbr.com'.
dosdox ./mbr.com
Coolzies! Let's pack it all together.
What we have so far?
1. A WebP (losless) image.
2. Our awesome bootable 'mbr.bin'.
3. Knowledge how we can leverage the WebP structure.
When using 'mbr.bin' as the base for the image, we need to modify:
1. The 'VP8X' header, either by modifying canvas sizes, or copying the
existing one from the original image.
2. The size for our 'HACK' chunk. The size must be the sum of the code and
the padding sizes.
3. The padding size for the 'HACK' chunk is the size of the RIFF size
without image size and headers.
4. The position of the original image should be after our MBR code.
And that's it. I've written such a PoC. It's available here: [ref13], and can
be used like this:
./webp-polyglot -s mbr.bin -c -o out.webp in.webp
The command above will produce 'out.webp' that can be viewed, for example,
using a web browser, and at the same time, can be bootable, e.g., using QEMU:
qemu-system-i386 -fda ./out.webp
How awesome is that?!
But wait! There's more! We can embed all the files we were working on as a ZIP
archive into our image. I will again refer to the same issue of PoC || GTFO
from the introduction.
ZIP archives are another relic from ancient times. The ZIP format includes
metadata at the end of the archive file, which makes it convenient for
appending new files. This feature was especially useful when working with
floppy disks, as it reduced seeking, which was very costly.
The ZIP format is still evolving today and remains one of the most popular
archive formats out there, so it has pretty good support almost everywhere.
The creation of such a polyglot file is super simple. We just append a zip
archive at the end of our WebP picture:
zip -r a.zip file1 file2 file3...
cat a.zip >> h4x.webp
We of course want to leverage the appending property of ZIP. The question is if
the RIFF/WebP format allows it. What does the specification have to say about
this?
The file SHOULD NOT contain any data after the data specified by File Size.
Readers MAY parse such files, ignoring the trailing data.
That seems like a tentative yes, but we should test it in the viewers where we
intend to display it:
firefox: working
chrome: working
geeqie: working
Well, great job! We've completed our task, and now we have a valid
image/picture that can be booted on x86 architecture. Let's celebrate our
successes by looking at the spinning CPU when we boot our image in a virtual
machine!
No. This document is split in two parts because it started to be too messy. The
second part is here:
https://research.h4x.cz/html/2023/2023-09-01--webp_polyglot_ii-script.html
In the second part we will look at how to run a WebP image as a script.
[ref0] https://research.h4x.cz/html/2022/2022-10-11--scripting_in_c.html
[ref1] https://github.com/angea/pocorgtfo
[ref2] https://en.wikipedia.org/wiki/Comparison_of_web_browsers#Image_format_support
[ref3] https://www.tactilemedia.com/info/MCI_Control_Info.html
[ref4] https://developers.google.com/speed/webp/docs/riff_container
[ref5] http://ref.x86asm.net/coder32.html
[ref6] https://developers.google.com/speed/webp/docs/riff_container#unknown_chunks
[ref7] https://developers.google.com/speed/webp/docs/webp_lossless_bitstream_specification
[ref8] https://mbrserver.com/
[ref9] https://www.youtube.com/watch?v=RKPKZX41A60 (MASTER BOOT RECORD - 1 8086 [PERSONAL COMPUTER])
[ref10] https://cdrdv2.intel.com/v1/dl/getContent/630266?wapkw=630266
* Removal of Legacy Boot Support for Intel Platforms
* WW31, August 2023 ; Document Number: 630266
[ref11] https://en.wikipedia.org/wiki/Hackers_
[ref12] https://gist.github.com/XlogicX/8204cf17c432cc2b968d138eb639494e
[ref13] https://github.com/fandauchytil/webp-polyglot
The goal is to have an x86 bootable image/picture.
PNG:
[8 bytes] Magic: 89 50 4e 47 0d 0a 1a 0a
00000000: 8950 4e47 0d0a 1a0a 0000 000d 4948 4452 .PNG........IHDR
$ printf '\x89\x50\x4e\x47\x0d\x0a\x1a\x0a' | ndisasm -b 16 -
00000000 89504E mov [bx+si+0x4e],dx
00000003 47 inc di
00000004 0D0A1A or ax,0x1a0a
00000007 0A db 0x0a
Not good. Writing to some memory region is not a good practice at all!
JPEG:
[2 bytes] Magic: ff d8
00000000: ffd8 ffe0 0010 4a46 4946 0001 0201 012c ......JFIF.....,
$ printf '\xff\xd8\xff\xe0\x00' | ndisasm -b 16 -
00000000 FF db 0xff
00000001 D8FF fdivr st7
00000003 E000 loopne 0x5
It might be doable, but let's see if there is an easier format that will not
cause an exception.
GIF:
[6 bytes] Magic: 47 49 46 38 37 61 ; GIF87a
[6 bytes] Magic: 47 49 46 38 39 61 ; GIF89a
00000000: 4749 4638 3961 2602 2602 f700 00ae 3e42 GIF89a&.&.....>B
$ printf '\x47\x49\x46\x38\x39' | ndisasm -b 16 -
00000000 47 inc di
00000001 49 dec cx
00000002 46 inc si
00000003 3839 cmp [bx+di],bh ; GIF87a -> 3837 cmp [bx],dh
Again, referencing some memory. Not good.
ICO:
[2 bytes] 00 00
$ printf '\x00\x00' | ndisasm -b 16 -
00000000 0000 add [eax],al
Nope.
BMP:
[2 bytes] 42 4d ; BM
00000000: 424d 3e30 0400 0000 0000 3604 0000 2800 BM>0......6...(.
$ printf '\x42\x4d\x36\x00\x24\x00' | ndisasm -b 16 -
00000000 42 inc dx
00000001 4D dec bp
Viable!
WebP:
[4 bytes] 52 49 46 46 ; RIFF
00000000: 5249 4646 dc56 0000 5745 4250 5650 3858 RIFF.V..WEBPVP8X
$ printf 'RIFF' | ndisasm -b 16 -
00000000 52 push dx
00000001 49 dec cx
00000002 46 inc si
00000003 46 inc si
WebP is looking great!
RIFF_SZ
.-------------------------------------------------------------------------------------------.
| MBR_SZ |
v--------------v--------------------------------------------------v v
"RIFF" RIFF_SZ "WEBP" "VP8X" VP8X_SZ 10 "EXIF" EXIF_SZ EXIF_DATA_SZ EXIF_padding "VP8L" VP8L_SZ VP8L_DATA_SZ
^ 4 + 4 + 4 + 4 + 4 + 10 = 30 = 0x1e ^ ^ ^-------------------------^
|-------------------------------------' | 4 + 4 + VP8L_DATA_SZ = 8 + VP8L_DATA_SZ
| 30 + 4 + 4 = 38 = 0x26 |
'----------------------------------------------------'